Restoring a historic property is challenging but rewarding work. It requires a deep understanding and gratitude for the building’s historical and architectural significance and the skills and knowledge needed to restore it to its former glory. It also needs a lot of patience, attention to detail, and dedication to the project, as fixing a historic property often takes much longer than remodelling a modern home.
However, the result is well worth the effort. By restoring a historic property, you are holding a piece of history and ensuring that future generations can enjoy the beauty and craftsmanship of the past. A beautifully restored historic property is also a source of pride for the community and can even positively affect property values in the surrounding area.
Suppose you’re thinking of restoring historic property. In that case, it’s essential to approach the project with a clear understanding of the challenges and conditions involved, as well as a strong passion for the history and architecture of the building. With the right team, materials, and approach, you can design a stunning and authentic restoration that will stand the test of time.
Here are seven vital steps in restoring a historic building:
Table of Contents
1. Your vision
It is essential to know what you want when restoring your property. You need to be able to go into every room and picture exactly how you want it to look when it is finished, and this gives you a starting point for planning the actual work. If you have a good imagination and eye for design, then do this step yourself. If you need more creativity, get a designer to help you plan and create your dream vision. Check out these before and after photos for some inspiration.
When creating a vision for your property, it’s essential to consider a few key factors, such as the historical significance of the building, your tastes and preferences, and the overall functionality of the space. Some questions you may want to ask yourself include the following:
- What is the architectural style of the building, and how can I highlight or enhance its unique features?
- What are my must-haves for functionality, such as modern amenities or energy-efficient upgrades?
- What kind of atmosphere or mood do I want to create in each room, and how can I use color, lighting, and furnishings to achieve that effect?
- How can I balance preserving the historical virtue of the building with incorporating modern design elements?
By answering these questions and developing a clear vision for your property, you’ll be better prepared to plan and execute your restoration project, whether doing it yourself or operating with a designer. And, as you mentioned, looking at before and after photos of other restoration projects can be a great source of inspiration and ideas.
2. Write your lists

Once you have decided what you want, it’s time to plan how you’re going to make that happen. Lists are going to be your best friend at this stage, write down everything you’re going to need, when will you need it by and how much will it cost, including the costs of addressing issues such as rising damp and other issues that older building are more susceptible to. This step requires thorough research, but it is so important to be fully organised before the work begins, that way you will feel fully in control when all the madness starts.
Creating lists is essential to the planning process when restoring a property. Here are some lists that may be helpful:
Materials list:
This list should contain all the materials you will need for the restoration, including flooring, tiles, fixtures, and fittings. It’s essential to scrutinize each material to ensure that it is appropriate for the building’s style and age and durable and long-lasting.
Budget list:
This list should include all the expenses associated with the restoration, including materials, labor, permits, and any unplanned expenses. It’s essential to be realistic and thorough when estimating costs and to leave some room in the budget for unexpected expenses.
Timeline list:
This list should outline the timeline for the restoration project, including start and end dates for each phase of the project. It’s essential to be realistic about the timeline and build flexibility for unexpected delays or issues.
Professional list:
This list should contain all the professionals you will require for the restoration, such as architects, builders, and artisans. Exploring each experience professional and hiring those with experience working with historic buildings is essential.
Tasks list:
This list should include all the tasks that need to be completed for the restoration, such as waste, electrical work, plumbing, and painting. It’s essential to break down each task into shorter steps and to assign each step to the proper professional expert or team member.
By creating these lists and staying organised throughout the restoration process, you can ensure that the project stays on track and within budget and that the final result meets your vision and expectations.
3. Out with the old
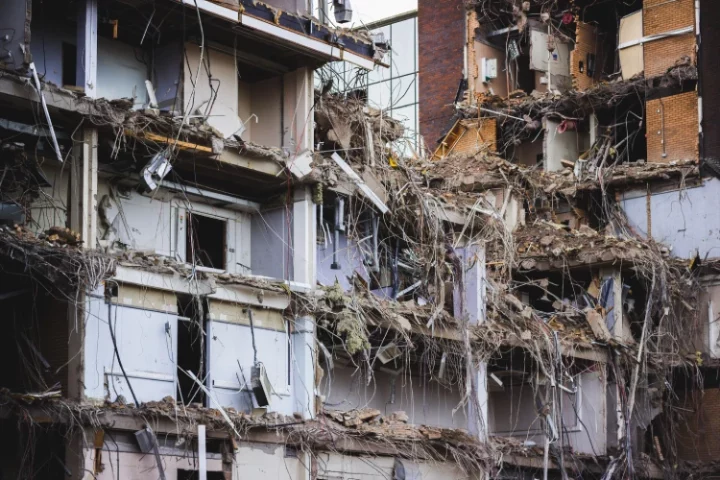
This is when you will start getting rid of everything you aren’t going to be keeping. It can vary massively from room to room on how much is going to be demolished, some rooms might be completely stripped bare are started over, whilst others might just require some minor damage fixed and some fresh paint.
The demolition and removal phase is a crucial step in restoring historic property. Here are some tips for this stage of the process:
Take care with demolition:
If you plan on demolishing parts of the building, it’s essential to do so carefully and methodically. It will help to minimize damage to the remaining structure and ensure that any salvageable materials are not accidentally destroyed.
Salvage what you can:
Speaking of salvageable materials, trying to salvage as much as possible during the demolition phase is a good idea. It could include things like original flooring, fixtures, and architectural features. These items can often be restored and reused, adding character and historical authenticity to the final result.
Remove hazardous materials safely:
Many older buildings contain hazardous materials such as asbestos, lead, and mold. Hiring professionals to safely remove these materials before beginning any restoration work is essential.
Keep safety in mind:
During the demolition phase, safety should be a top priority. Ensure that everyone involved in the restoration is wearing appropriate safety gear, and take precautions to ensure that the building is structurally stable during demolition.
By taking care during the demolition and removal phase, you can ensure that the restoration process gets off to a good start and that the final result is safe, beautiful, and authentic.
4. Setting the infrastructure
At this stage, it is time to work on the basics, to build a decent base for your new and exciting features. This can involve fixing the walls, removing rotten floorboards, sorting the lighting.
Setting the infrastructure is essential in the restoration process, as it lays the foundation for the rest of the project. Here are some things to consider during this stage:
Structural repairs:
This stage may involve fixing or replacing any damaged or unstable structural elements of the building, such as walls, beams, or foundations. Working with professionals is vital to ensure these repairs are done correctly and safely.
Electrical and plumbing work:
This stage may also involve updating or replacing the building’s electrical and plumbing systems to meet modern safety standards and accommodate new features or appliances.
Insulation and ventilation:
Depending on the age and condition of the building, it may also be required to add insulation and improve ventilation to increase energy efficiency and comfort.
Lighting and fixtures:
This stage may also involve installing new lighting fixtures and updating or correcting any original fixtures that will incorporate into the final design.
Flooring and walls:
Finally, this stage may involve repairing or replacing any damaged flooring or walls and preparing them for the next stage of the restoration process, such as painting or tiling.
By setting the infrastructure at the beginning of the restoration process, you can ensure that the building is safe, functional, and ready for the project’s next phase.
5. The fun begins
Now we’re getting to the good stuff, this the stage where you start adding your new features and making that vision from step 1 a reality. At this stage, you will inevitably come across setbacks and issues that will change your plans and make you rewrite your lists over and over again. The fun of restoring a historic building is that they are never predictable, and you will always hit some bumps in the road that require you to come up with a solution.
The “fun” stage of the restoration systems is when creativity comes into play, and you can start seeing your vision take shape. Here are some tips for this stage of the process:
Prioritize:
At this stage, prioritizing your projects and focusing on the most critical elements first is essential. It will help to ensure that the most critical elements are completed before running out of time or resources.
Get creative:
This stage is where you can let your imagination shine. Whether incorporating salvaged materials into your design, experimenting with new color schemes, or trying out unique textures and finishes, don’t be afraid to take risks and try new things.
Be flexible:
As you noted, setbacks and unexpected issues are common during a repair project. It’s essential to be flexible and willing to adapt your plans to overcome these challenges and stay on track.
Work with professionals:
While trying to tackle everything alone can be tempting, it’s important to remember when you need help. Be bold and hire professionals for tasks beyond your skill level or requiring specialized expertise.
By embracing the challenges and opportunities that arise during the “fun” stage of the restoration process, you can create a truly unique and beautiful space that reflects your style and the history of the building.
6. Light at the end of a tunnel
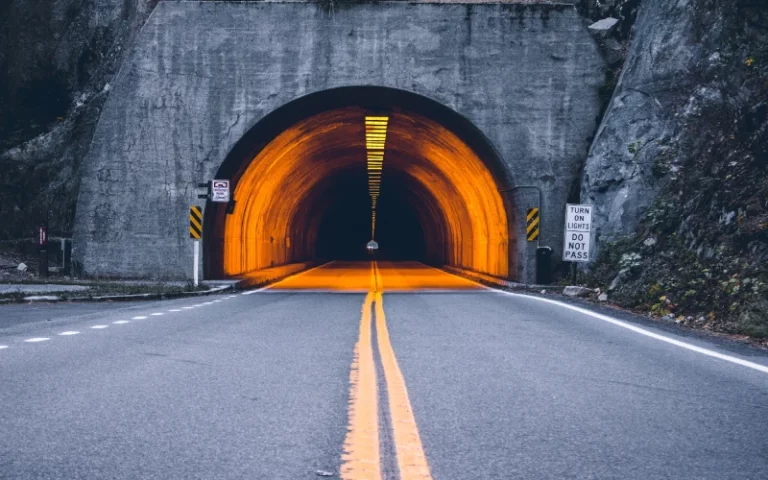
Once you’ve got over the inevitable hurdles, you will start to see your project coming together nicely. This step is satisfying as you will start to see all your hard work pay off. Your rooms will finally look like rooms again, and you can slowly start to put them back together. Walls are fixed, mouldings can go up, and any of your favourite historic feature that may have been removed for the work to take place, can be reintroduced.
Reaching a restoration project’s final stages can be exciting and stressful. Here are some things to keep in mind as you approach the finish line:
Take your time:
Speeding up the process at this point can be tempting, and ensuring everything is done correctly is essential. Rushing can lead to mistakes that may be costly to fix later on.
Pay attention to details:
The finishing touches will make your restoration project brilliant. Pay attention to small details like hardware, lighting, and paint colors to ensure everything works together seamlessly.
Please keep track of costs:
As you approach the end of the project, it’s essential to keep a close eye on costs to ensure that you stay within your budget. Make sure you have enough funds to complete the project and cover any unexpected expenses that may arise.
Celebrate your success:
Once the project is complete, take some time to celebrate your hard work and the beautiful space you’ve created. Invite friends and family over to admire the finished product and take pride in the fact that you’ve restored a piece of history.
By staying focused on the details and taking pride in your work, you can ensure that your restoration project is a success and a source of pride for years.
7. Make it yours
Now your rooms are back together, it is time to get decorating. This is where you can really start to bring your creativity to life and make your historic house a home. Everything from wallpaper and paint to sofas and lampshades will add character and flare to your new building. Check out this guide of tips and tricks for interior decorating.
The whole process of restoring a historic building is a journey, and it helps to have a specialist on hand to help you every step of the way. Visit this website for information on historical restoration specialists.
Adding personal touches to your restored historic property is an exciting step, and there are many ways to make the space your own. Here are a few tips to keep in mind:
Choose a style that complements the historic nature of the property:
When decorating, it’s essential to choose a style that complements the historic nature of the building. It doesn’t mean you have to stick to a specific era, but rather that the overall look and feel of the space should reflect its history.
Mix old and new elements:
One way to add interest to your decor is to mix old and new elements. Consider incorporating antique furniture pieces alongside modern accents like art or lighting.
Incorporate historical details:
If your property has original features like exposed brick or decorative molding, consider highlighting these details in your decor. It will help to further emphasize the historic nature of the property.
Use color to add character:
Color can be a great way to add character and personality to your space. Consider using bold colors on walls or incorporating patterned fabrics to add interest.
By incorporating these tips and working with a specialist in historic restoration, you can create a space that is both functional and full of character.
Frequently Asked Questions
Having a clear vision is essential before starting a restoration project. It helps to define the goals of the project and guide the decision-making process throughout the restoration.
Restoring a historic property requires a team of experts including architects, builders, electricians, plumbers, and restoration specialists. Each professional brings their own expertise to the project to ensure its success.
Creating a list of items needed for a restoration project involves researching the materials and supplies required, creating a timeline for the project, and estimating the costs. This information can be used to create a detailed list of everything needed for the restoration.
Setbacks during a restoration project can include uncovering unforeseen damage, encountering unexpected costs, and dealing with regulatory requirements. These setbacks require flexibility and creative problem-solving to overcome.
Adding personal touches to a historic building can be done in a way that preserves its historic character. This can include using historically accurate paint colors, adding period-appropriate furnishings, and incorporating modern amenities in a way that does not detract from the building’s historic charm.